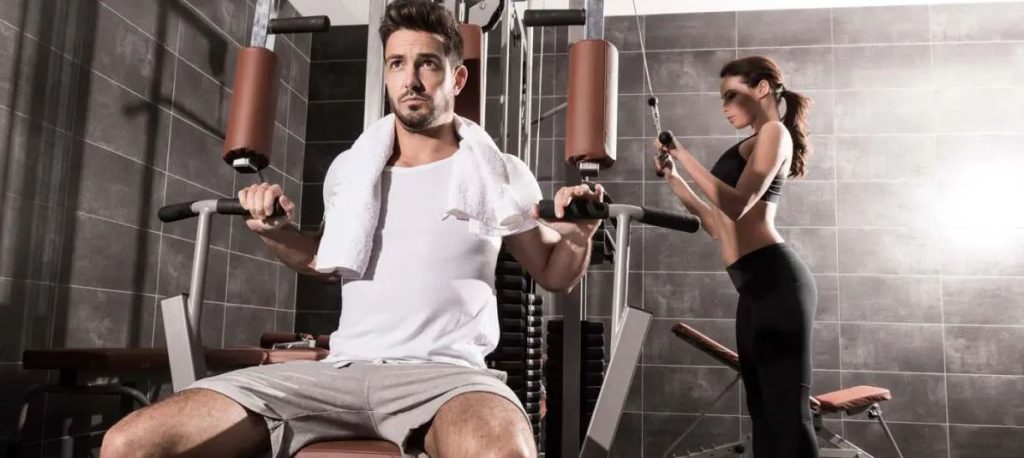
Including the External Rotation with Pulley in your routine can bring many benefits to the muscles of the rotator cuff of the shoulders, let’s see how it is done!
What’s more, the External Pulley Rotation helps to avoid injuries. This is why we can say that this shoulder exercise is essential as a warm-up before any workout.
Now, it is important to clarify that you do not need to use a lot of weight to perform the external shoulder rotation exercise with the pulley machine since rotator cuffs cannot handle and control as much force as some larger muscle groups.
So, keep this in mind when setting the load, without more to say, let’s see how the exercise is performed correctly.
HOW TO PERFORM EXTERNAL ROTATION ON PULLEY?
Stand sideways next to a pulley machine so that the cable is at waist height.
Take the handle with your outer hand (thumbs up), forearm crossed and elbow securely fastened to your sides.
The elbow should remain flexed at 90 degrees with your hand extending along the front of your torso.
Stay away from the pulley point of origin until you feel the tension in your outer hand.
While keeping your arm flexed and your elbow firmly attached to your waist, slowly move the handle out of your body (out and back, like an opening door) until your forearm is more or less perpendicular to your abdomen.
Slowly return the handle to the starting position. Complete all the repetitions with this arm, and then switch arms, now looking in the opposite direction.
TIPS FOR EXTERNAL ROTATION ON PULLEYS
I repeat it again, keep the load low enough so as not to overexert yourself that damages your muscles.
Your hand moves in a horizontal arc with your forearm parallel to the floor. That’s why it’s good to keep your elbow fixed in place. Stay focused on moving the handle without changing the position of your elbow.
If you notice that you are moving your elbow or upper body, lower the load used.
If you have shoulder problems or a previous injury, be very careful with this exercise, although it might be best to avoid it altogether.
Looking for new exercises to incorporate into your triceps training routines? We bring you the extension exercise with bar to develop the triceps.
In previous articles of the exercise guide for arms we saw two variants of the French press, one with bar and one with dumbbells.
The common thing among these exercises for triceps is that they were performed in a horizontal position, lying on the flat bench, varying the difficulty of execution between one and the other (the dumbbell was easier to perform).
Today we present a new variant to perform with barbell, and it is an exercise called “Arm extension with barbell”. This allows us to exercise the triceps muscles in a very complete way.
HOW TO PERFORM THE EXTENSION WITH BAR TO DEVELOP TRICEPS?
We sit on a bench with a low backrest, or we stand with our lower back well locked.
We carry the bar behind the nape of the neck taking it in a pronation grip.
We inspire and perform the extension of the forearm, exhaling once the bar reaches the end of the movement.
The grip in Pronation favors the work of the vast external triceps. Let’s see, below, a video where the exercise technique is better described, it is in English but the movement is displayed correctly.
5. TIPS FOR PERFORMING THE BARBELL EXTENSION EXERCISE
The movement should occur at the elbow only, for this keep the arms parallel to each other and perpendicular to the ground.
Always keep your elbows close to your head, do not let your elbows open to the sides and do not let your arms stay high.
Contract your abdominal muscles and avoid arching your lower back. If possible, use a bench with lower back support. If it is not available, you can also lean on a flat bench, but be sure to sit in an upright position with your feet flat on the floor.
Lowering the bar too quickly can cause a “bounce” effect to appear over the back of your neck, this can cause serious damage to your vertebrae.
You should always work within your own capabilities, if necessary lower the amount of weight to keep under control the impact on the back.
Looking for exercises to stretch your quadriceps? Do you want to know the best techniques and how to perform them correctly? Throughout this article you will find everything you need to gain more flexibility in your legs by learning how to properly stretch your quadriceps.
Stretching the quadriceps is something that people commonly do before or after any sporting event, right? And yes, we are familiar with this movement more than anything by copying from other people.
But in truth, what is the real knowledge we have of stretching exercises for quadriceps, keep in mind that a minimum error in the way of performing them can considerably reduce effectiveness.
For example, there is a mistake that many people often make when performing some of these exercises, and that is to let the knee go forward when stretching. What? Did you think this was correct?
Let’s see below what is the correct technique to stretch the quadriceps both in the classic way and with new stretching exercises that you may not know and that can be very useful in certain conditions.
LET’S SEE WHAT ARE THE QUADRICEPS MUSCLES
We have already seen it in the article ANATOMY OF THE MUSCLES OF THE LEG, but let’s go back to review this muscular area.
The quadriceps make up most of the muscles in the anterior leg area (the front).
And as the name implies, there are four parts: the rectus femoris, the vastus medial, the vastus lateral, and the vastus intermediate.
The rectus femoris is the only part of the quadriceps that crosses the hip, so it must be stretched differently. The vastus lateral, medial and intermediate originate from the femur.
These are inserted into the kneecap through the quadriceps tendon. Even some fibers of the vastus interna are inserted directly into the medial aspect of the patella.
Now that we review a little anatomy, let’s understand how to properly perform stretching exercises for the quadriceps.
STRETCHING EXERCISES FOR QUADRICEPS
STANDING QUADRICEPS STRETCH
This is the most well-known way to stretch the quadriceps. In this case you can place yourself next to a bench or a high surface in order to hold yourself with one hand if you cannot keep your balance.
Raise your leg from this position and take your right ankle with your right hand, while with your left you support yourself or help you maintain balance.
Straighten your back, lift your chest up, and pull your ankle back and up slowly.
If you are able to bring your knee behind you as in the photo, you can focus a little more on stretching the rectus femoris.
Hold this position for the appropriate amount of time and then repeat with the other leg.
FOR FURTHER FOCUS ON THE RECTUS FEMORIS TRY THE FOLLOWING VARIANT:
QUADRICEPS STRETCH ON THE FLOOR
If you have problems with balance on one leg, it is possible to do this exercise lying on your side. For example, to stretch the right side, simply do the following:
Lie on your left side, take your right ankle behind you and pull the ankle pressing towards you.
With this exercise you can also include the anterior rectum, for this you should pull the knee back making sure to keep the abdominals contracted and the pelvis blocked. Do not allow your back to arch at any time during the exercise.
You can even try this stretching exercise with your body fully lying on your stomach, let’s see below.
STRETCH QUADRICEPS WITH YOUR KNEES ON THE FLOOR AND ON YOUR BACK
In this exercise, basically, you should sit on your heels, with your thighs slightly apart.
Keep straight the leg that you are not going to stretch and the other flex it resting it on the floor.
You begin to tilt the trunk back while holding on to your elbows at the moment you begin to feel how you stretch your flexed leg.
The more you lay the trunk, the more work will be done on the muscle. You may even end up lying completely on the floor on your back, but to achieve this you must gain more flexibility if your quadriceps are very rigid.
BENEFITS OF QUADRICEPS STRETCHING
The quadriceps tend to be shortened in older adults or in those who train and perform a lot of muscle activity on this area.
For example in sports such as weight training, football, basketball or any sport that uses that muscle in excess.
As in general, the great neglect is the rectus femoris, this tends to be particularly shortened and therefore can disrupt the normal mechanics of the joints, making one more prone to injury.
By performing a properly designed stretching routine we can avoid any potential problems on these muscles, from undesirable tears to certain day-to-day discomforts.
Adductor Stretching Exercises
Back Stretching Exercises
The Best Forearm Stretching Exercises
Exercises for quadriceps stretching
The Best Exercises to Stretch the Hamstrings
The Best Exercises for Stretching Calves or Calves
Would you like to implement new exercises to stretch calves? And yes, nowadays it is common to see many people suffer from different problems in the calf muscles due to lack of flexibility. So, let’s see what are the best exercises to stretch the calves or calves.
Pathologies such as: PLANTAR FASCIITIS, fibula tendinitis, Achilles tendonitis and tendinosis, posterior tibialis tendinitis, and the list goes on.
Muscle stiffness of the calves is such a common problem that many people do not realize the degree of tension they suffer until they go to the doctor and perform routine tests.
Posture, high heels, and certain hereditary factors can contribute to shortened calf muscles.
And this is more serious than you think, think that the feet are the bottom of the kinetic chain.
As your foot moves, it influences the movement of your knee, hip, and lower back.
If the foot moves abnormally, product of trying to compensate for the shortened calf muscles, different aches and pains can be transferred to the spine.
If you want to review more in depth the subject of the calf muscles you can enter to read the following article: THE MUSCLES OF THE LEGS.
WHY CAN CALF MUSCLES BE SHORTENED?
There are many reasons why calf muscles can be shortened, let’s look at a simple example of why it happens so you can extrapolate it to any similar situation.
If women wear high-heeled shoes too often their cufflinks will remain shortened for long periods of time.
And if you keep the muscle in this shortened position, over time, it will accommodate to that new length. This means that the position and use can affect the area, right?
This exercise for twins mainly involves the gastrocnemius muscle.
The exercise consists of supporting the foot straight, with the entire sole of the foot at a sufficient distance from the wall (about three steps) and with the knee extended.
Progressively we will regulate the tension by tilting the body forward, while keeping the back upright.
Maintain the posture for about 30 seconds, rest and repeat 3 times, and remember that it should always be done after an activity.
STRETCHING OF THE SOLEUSMUSCLE
Again stand a few steps from a wall and stretch your foot behind you, making sure your feet are facing forward.
Then lean forward on your ankle while bending your knee and keeping your heel on the floor.
Basically, the movement consists of flexing the body downwards and tilting it forward like the previous one.
Because the knee is now flexed, the tension is transferred from the gastrocnemius to the soleus.
Again, you have to maintain this position for about 30 seconds, rest and repeat 2 more times.
STRETCHING IN FRONT OF THE WALL
To perform this calf stretching exercise, you should stand about two feet away from a wall or on a step of any ladder.
Place the base of your right foot against the wall, while the heel remains on the floor.
Slowly and gently hold with the wall, keeping the knee straight.
Hold this posture for up to 30 seconds, then relax and repeat with the other foot.
YOGA STRETCHING
Lie on the floor, face down and with your hands under your shoulders.
Extend your hands slightly forward on the floor.
Then extend your fingers but separate them to achieve a wider base of support.
Push your hips up and compress your abdominal muscles.
Keep your heels on the floor and gently try to straighten your knees. Hold this posture for up to 30 seconds.
SITTING CALF STRETCH
Sitting in a chair or on the floor and with one leg extended in front of you. Take a towel or belt, and holding it from both ends and with each hand, pass it around the tip of your foot.
Now pull this one so that the foot goes towards you. You can perform 3 repetitions of at least 30 seconds each.
Tips: To stretch the gastrocnemius muscle, keep your knee straight while stretching. Now, to stretch the soleus, bend the knee slightly (about 20 degrees).
WHY IS IT IMPORTANT TO STRETCH THE TWINS?
It is important to keep the calf muscles elongated to be able to walk well, and correctly execute any exercise we do.
One should be able to bring the foot 15 degrees up in order to walk normally.
If the ankle cannot be moved in this way, then compensatory movements begin to affect other joints, such as the front of the foot or knee, generating different types of injuries at the level of these areas.
For this reason, it is essential to gain greater flexibility in the calves, any sport or activity you do will benefit from this.
THESE ARTICLES MAY ALSO INTEREST YOU
Adductor Stretching Exercises
Back Stretching Exercises
The Best Stretching Exercises for Forearms
Quadriceps stretching exercises
The Best Hamstring Stretch Exercises
The Best Exercises for Stretching Calves or Calves
Do you really like to train your body with gym equipment but fight against time when it comes to going to the gym and doing a good workout? If this is your case, a multigym may be the solution to your problems.
I’m here to tell you that you can still perform your workouts at your own pace and in the comfort of your home with the help of a multigym.
But, first of all… Do you really think it’s the right choice for your training goals?
Let’s look at everything you need to know to answer this question, outlining the basics you need to know about this workout equipment.
WHAT IS A MULTIGYM?
A Multigym is a multi-exercise equipment that combines pulleys, butterflies and a leg extension station, allowing you to combine movements in a very broad way to achieve the complete training of your whole body.
The goal is to obtain a practical combination of multiple training machines at a cheaper price.
HOW IS A MULTIGYM SET UP?
In general, the base of a multigym consists of an adjustable multipurpose bench with backrest and other stations attached to the equipment, along with upper and lower pulleys. Through which steel cables pass.
Incidentally, both these cables and pulley bearings must be made of durable and good quality materials.
TYPES OF MULTIGYM
BENCH PRESS MULTIGYMS: They can be attached to the structure of the bench press and allow us to train the muscles of the trapezius and chest. They can be the most comparable to training in the gym. However, they are usually the least practical in terms of space.
COMBINED BENCH AND PULLEY PRESS: allows effective training of all muscle groups in the upper and lower parts of the body. Here we lift the weights by pulling the ropes, training the trapezoids, biceps and triceps muscles in the process.
THE COMBINED MULTIGYM: Here we have pulley exercises, peck deck and an additional leg extension station.
Thanks to this, this device is more than enough to provide a complete weekly workout: you can exercise the arms, chest muscles, back and legs.
The upper pulley will strengthen your arms and back muscles, the lower pulley helps you simulate rowing motion, and the leg extension will strengthen your legs, you can even do side extensions.
BEWARE OF THE MAXIMUM WEIGHT LIMIT
There are many models of multi-gyms on the market, they usually have a weight limit of up to 130 kg, and sometimes even up to 150 kg (for tall athletes up to 2 m).
And because the multigym is heavy equipment it is necessary to ensure a minimum of stability, avoid unnecessary injuries and do not underestimate the maximum weight limit recommended by the manufacturer.
Generally speaking, the more expensive the multigym, the better its ergonomics and range of motion. Public gyms require more rugged equipment than home gyms. However, if you intend to work intensively at home, then it is advisable to invest in a multigym with a robust structure.
DO YOU HAVE ENOUGH SPACE?
Depending on the type of multigym you choose, in general you will need a space of approximately 3 m in length and 2.5 m in height.
Before buying it, think if you want to train only the upper half of your body or if you want to concentrate on your legs as well. You will need a space commensurate for all this.
However, there are also multipurpose gyms for small spaces.
WHAT SHOULD WE CONSIDER WHEN CHOOSING THE MULTIGYM?
The training objective
The Maximum Weight Limit
Dimensions and space needed
The Price vs Quality ratio
Whether or not you have customer service and assembly
The Warranty Period
BENEFITS OF A HOME MULTIGYM
Here are six main benefits of home multigym equipment:
ALLOWS US TO PERFORM A WIDE VARIETY OF WORKOUTS
A multigym will allow you to perform several types of exercises for each important muscle group.
You can easily train your chest, back, shoulders, arms and legs using a multigym.
They come equipped with pulleys, weights, pull-up bars and will ensure that you have a complete body workout.
YOU CAN BUILD MUSCLE AND BURN FAT
Multigyms are very good when it comes to strength training.
They offer resistance through the use of weight piles and pulley system. This makes them an ideal choice for people who want to build muscle.
As you strengthen your body with consistent workouts, you can increase endurance and expect better results.
Another added benefit is that multigym can also speed up weight loss, as you will surely burn calories with each training session.
While these effects can be seen in almost any other team, we can highlight them as well.
THEY ARE IDEAL FOR USE AT HOME
A key advantage of a multigym is that it won’t take up too much space in your home. They won’t take up much space in your home and are ideally designed to fit in any corner of the house.
Although they are spacious in terms of weight, length, and height, they can still be installed in any corner of your room or garage, and they definitely take up less space than their equivalent in individual equipment.
IT IS A SAFE AND EASY TO USE EQUIPMENT
When it comes to lifting heavy loads, dumbbells, or any type of free weight, we are more likely to suffer an injury due to poor posture or if you try to lift too much weight.
However, with multigyms, the chances of injury, while still existing, are significantly reduced. This is because they are easy to use and require less coordination than exercises with free weights.
But be careful, this applies to movements that have support, if for example you are going to do a bicep curl with low pulley, well, it is the same as in the gym.
The most important thing to avoid possible injuries is that the condition of the bearings of the pulleys (and the cable) are in optimal condition.
YOU DON’T NEED PROFESSIONAL HELP
Since multigyms are safe and easy to use, you don’t need to seek professional help to learn how to use them. They are self-explanatory and understanding how the machine works requires almost no effort. That’s why they are one of the best fitness equipment on the market for your home.
Just find an exercise guide, and you’re good to go. In the Total Bodybuilding exercises section, you can find many of these.
THEY ARE BUILT TO LAST
Multigyms are designed to be durable. They will keep your body healthy and make sure your finances are under control by making sure you don’t spend on maintenance and conservation. All you have to do is use the machine properly and clean it from time to time.
Having your own multigym fitness equipment may seem like a great investment, but it will actually help you save money in the long run, especially if you buy a high-quality multigym because it will last a lifetime.
CONCLUSION ON MULTIGYM
Are you definitely determined to buy a multigym now? Not bad. This multi-purpose home workout equipment will help you build your muscle mass effectively, improve your overall health and boost your confidence.
Let’s analyze how to correctly perform the deadlift, plus some training tips to take this exercise to its maximum level.
I have been to several gyms throughout my life and do you know how many people I saw doing the deadlift? NONE. In all the time I was in the gym I didn’t see a single person do the deadlift.
And they don’t know what they’re missing! The deadlift is one of the most complete exercises and which even has anabolic characteristics.
The Deadlift trains the legs, buttocks, back, arms, forearms, shoulders, trapezius, and abs. Not bad for a single exercise, right?
As I told you before, it will help you give a testosterone shock to the whole body, which will facilitate muscle development.
So, if it’s such a complete exercise… Why do so few people incorporate them into their training programs? I’m sure it’s not out of disinterest, I’d say many have simply never seen or heard of the dead weight yet.
Another reason could be that being a very exhausting exercise for the body, both mentally and physically; Gym trainers do not include it in routines.
In short? Most people do not know or do not know how to properly perform this lifting exercise. Therefore, and at the request of one of our readers (Eduar) I explain how to correctly perform the Deadlift exercise.
HOW TO DO THE DEADLIFT?
First of all, let me tell you that every repetition of the deadlift must begin on the ground.
Keep in mind that the exercise does not consist of moving the bar up and down as in the squats or the bench press.
You start at the bottom, pull the weight up, and then go back to the floor.
Here are the 7 steps to perform the deadlift with the correct technique:
The starting position: Place your feet under the bar in a width less than the shoulders, to take the bar comfortably. Keep your back without arching and point your toes out at about 15°.
Take the bar: Grab the bar with a grip similar to shoulder width. If you have a mirror, pay attention that your arms are upright before lifting the load. Keep your gaze straight ahead to maintain the correct back position.
Start of Elevation: Raise the bar by extending your knees. DO NOT allow the bar to move away from the middle of the foot. If you scroll outward, start from scratch with step one.
Elevates the Chest: Straighten your back by elevating your chest, not your lower back. Do it without changing your position, keep raising the bar keeping it above the foot.
Breathe: Take a big breath, hold the bar, and stand with your weight. Keep the bar in contact with your legs while holding it. DO NOT shrink or lean back. Lock your hips and knees.
Return the weight to the ground: Do this by unlocking your hips and knees and then lowering the bar by moving your hips back, keeping your legs almost straight. Once the bar is below your knees, bend your legs more. The bar will land on the middle of your foot, ready to start a new next repetition.
Rest for a second or two between repetitions: Then, holding yourself in the preparation position with your hands on the bar, take a large breath, and pull again. Each repetition must start from a stalemate. Don’t bounce the weight off the ground or throw it with bad technique.
Deadlifts are not as easy to perfect as other exercises, and it can be difficult to keep track of the complexities of the movement, especially when initiated.
I recommend you to do the training with a partner, or better yet with a trainer, to guide you in performing the correct movement.
What’s more, it would even be a great idea to make a video recording of your deadlift technique for later study.
WHAT SHOULD WE NOT DO WHEN PERFORMING THE DEADLIFT?
Do not round your back in any of the deadlift movements. This will make your back vulnerable to injury. Focus on maintaining the correct arch of your back, with your chest and head high and your eyes facing forward.
Do not pull the bar over your thigh. The movement should be smooth from top to bottom.
Do not lean forward or move your feet during the ascent. Doing so could put you at risk for a serious back injury. Push the ground with your feet and keep the bar as close to your center of gravity.
Don’t train too much from the start. Give yourself the time to strengthen your accessory muscles while you incorporate the technique.
Today we are going to see two variants of exercises for arms that help us to focus muscle development on the forearms. The curl of forearms with dumbbell.
Although, at first glance both are similar, what differentiates them between if it is the grip type, in pronation for one and in supination for the other.
In short? They are two exercises for forearms that can help us give strength, volume and definition to this area, obviously, according to the objective we seek.
For this reason, and in order to achieve a result as harmonious as possible, they should not stop implementing them in any gym routine they are carrying out, they will see how with time and hard work they will obtain excellent results.
FOREARM CURL WITH PRONATION GRIP
The exercise is performed sitting, with the forearms resting on the thighs or on the bench and grasping the dumbbell in pronacion and the wrists flexed downwards.
I particularly prefer to rest the forearms on the thighs since I do not expose the back so much, but this is already everyone’s decision. It is not that they are at risk of injury but rather a matter of comfort.
We breathe in, perform an extension of the wrist, and exhale at the end of the movement.
This arm exercise is excellent for strengthening the wrist joint whose weakness is typical of the extensor muscles.
FOREARM CURL WITH SUPINATION GRIP
In the same way as the previous exercise, this one, we will do it sitting, with the forearms resting on the thighs or bench and grabbing the bar in Supination.
We breathe in, perform an extension of the wrist, and exhale at the end of the movement.
This exercise works intensely, not only the muscles of the forearm as we have already seen, but it is also beneficial for the muscles of the hand.
Training tips for developing forearms
Both exercises combined, and as we saw with the “Biceps curl with grip in pronation”, will be very beneficial for those athletes who work with their hands, with this we mean from boxers to even basketball players or tennis players. Let’s look at some tips.
Tips for curl of forearms with dumbbells and grip in Pronation
For this exercise to be effective, they must execute the exercise in its full amplitude, that is, between 100 and 150°. Obviously, this will depend on the flexibility of your wrists and the load used.
If they find that the movement is not higher than 45°, and work with too heavy a load. Remember, the greater the load, the more firmly it must be held. This will result in shortening of the flexor limiting the width of the wrist joint.
The use of heavy loads, therefore, has two negative effects: first, the muscles cannot work properly (and therefore cannot grow) and, secondly, they will lose some flexibility.
For these reasons you should not work with an excessive weight that limits the complete flexion of the exercise, remember that the important thing is the technique and not the amount of weight.
Tips for curl of forearms with dumbbells and grip in Supination
Be sure to keep your arms straight and not tilt your torso over your elbows, because you cannot properly use the carpal or ulnar flexor muscles at the elbow joint.
When working with too much weight it is recommended that one kneel when using a bench. This variant is more comfortable. When working with a lot of weight, the wrists tend to slide thighs.
For best results, train at full amplitude, or at least between 90° and 120°. If they can’t, it’s probably because you’re using too much weight or too tight a grip.
The elevation of twins in press machine, focuses on developing the calves and as you can imagine, for this uses the leg press machine, let’s see how it is done correctly.
And yes, performing a calf lift in a press machine allows you to isolate your calves very well. So, it’s time to take some pressure off your lower back and shoulders by doing an interesting version of the heel lift but on a press machine.
Of course, avoid doing partial repetitions or using too much weight so that you can do each repetition in its full extension.
Now, even if your knees stay straight and your torso bends at 90 degrees with respect to your legs, just as you do in the “donkey calf lift”. It is good to know how to properly perform this exercise.
HOW TO PERFORM THE HEEL LIFT IN PRESS?
Load the machine and position yourself with your toes on the edge of the platform, separated at about shoulder width (or hip width).
Extend your legs fully, keeping your back straight and your hips down against the pad.
Now perform the heel lift by pressing against the tips of the feet to raise the load, only the ankle should be moved.
Pause for a second at the top of the movement and then slowly return to the starting position.
And remember, you can leave a slight bend in the knees or extend the legs completely, but the movement only occurs at the ankles.
TIPS FOR CALF TRAINING WITH PRESS
Keeping your knees completely straight helps isolate the gastrocnemius. While a slight bend in the knees allows the soleus to contribute to the movement. In this way you can vary and better isolate each muscle by flexing or extending the leg.
Be very careful when performing the heel lift in a leg press machine. Never release the brakes on the press machine when performing the exercise.
Having the brakes hooked will not affect your calf training, since it is not necessary to bend the knees or lower the platform.
If you make a mistake and the load starts to go down, it will be difficult for you to raise it again with your feet so flush. And if your feet are not secure on the edge of the platform, they can slip so you can hurt yourself with the equipment.
If you want to know more exercises for calves you can see the heel lift exercise to train calves.
We have already seen how to perform the classic crunch to train abdominals, a basic exercise that cannot be missing in any routine. Let’s now move on to Crunch with Rotation.
Therefore, today we will add a little more difficulty by presenting the Crunch with rotation or also known as bicycle.
An integral exercise to train abdominals that puts greater emphasis on the training of the upper portion and the portion of the obliques of them, and that for this reason it is very important that we know how to do it.
HOW TO PERFORM THE CRUNCH WITH ROTATION?
Lie on your back with one knee bent at about 60° and with the other foot held on the floor. Place both hands on the back of your neck.
To perform the cross movement, rotate the torso in conjunction with the elbow and right shoulder obliquely and at the same time bring the left knee towards the right elbow.
Move your elbow as if you were going to touch the outside of your knee.
Finally repeat for the opposite side.
As you will realize this is not an exercise for beginners, so you should have trained assiduously with more basic exercises before fitting this into your routines; This is essential to be able to correctly execute the technique and benefit from the effects of this movement.
TIPS FOR CRUNCHING WITH ROTATION OR BICYCLE
Something very important is that they should not generate pressure with their hands on the nape of the neck or head when supporting them, if they observe that they cannot avoid it, place their fingers on the temple, as we have seen in other abdominal exercises, this will avoid generating excess pressure on the cervical area.
Do not move too much over the lumbar spine. Just raise yourself high enough to lift your shoulder blades off the floor. They should only roll over the spine when they bring their shoulders up from the floor every time the elbow approaches the knee.
Contract the abdominal muscles firmly to prevent involvement of the lower back. The shoulders should be out of support, but the lower back and pelvis should remain as still as possible.
The closer you bring your elbow to the opposite knee, the more and better the oblique muscles and rectus abdominis will contract.
Finally, try to keep your elbows far apart from each other.
We have already seen two variants for this classic abdominal toning exercise, the Classic Crunch, and the Crunch with flexed legs; Today we will add a third variant the Crunch with Hands Outstretched.
The movement itself is similar to the previous ones, but the possibility of extending the hands further increases the strength work on the area to be trained.
Even for the more advanced, they can take a disc with their hands and perform the exercise in this way to add a higher level of effort.
Of course, it is very important to perform this exercise with the proper technique to avoid any type of injury or pain in the lower back.
HOW TO PERFORM THE CRUNCH WITH ARMS EXTENDED?
Lie on the floor with your back straight and your knees bent, with about a 60-degree angle between your hamstrings and calves.
Keep your feet flat on the floor and stretch your arms over your head with your palms facing each other. This will be the starting position.
Contract your upper body forward. At all times, keep your arms aligned with your head, neck, and shoulder. Exhale as they perform this part of the movement and hold the contraction for a second.
Slowly lower yourself to the starting position while inhaling again.
Repeat the movement for the recommended number of repetitions based on your training plan and level.
Why is the outstretched arms crunch so effective?
When doing normal crunches, the hands and arms are usually placed behind the head or over the temple to serve as support. However, in this variant the hands are raised while doing the exercise which acts as additional resistance.
Therefore, the abdominals are forced to do all the work and the core has to provide the energy and strength to carry out the movement.
If done correctly, and accompanied by a good diet and aerobic exercise will tone the abdominals much faster. It will also help develop balance and overall stability.
TIPS WHEN CRUNCHING WITH OUTSTRETCHED ARMS
This is a very demanding exercise and you will surely feel like “burning” while doing it. That is why I repeat again, take care of the posture and follow the exercise guide as described above.
The number of abdominal exercises is not as important as how you perform each repetition. Do not arch your back and make sure it is aligned, it is the most basic of the movement. The movement must be controlled, do not rush up and down.
Once you reach the top position, stay up for a moment, and then slowly go back down. Always push each movement with your core body and not your back or arms.
If they perform some kind of impulse with these parts, they will only put more tension on the arms or back and not on the abdominals. So, to avoid impulses.